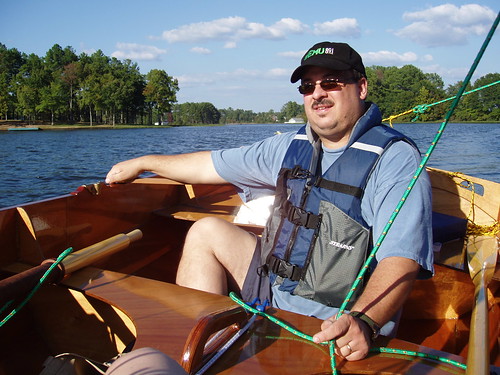
Tuesday, January 31, 2006
Sail Ahoy!
Sunday, January 29, 2006
Oars and ends

Today was a hodgepodge of activities. I began the morning lacing the leathers on the new oars I received recently. The lacing process was made more difficult by very confusing directions that came with the oar leather "kit". For instance, measuring distances from the "top" of the oar begs the question, "Which end is the top?" It is also unhelpful to say the seam should lie "parallel" to the blade, since a seam in any position around the 360 degrees of the loom (or shaft) of the oar could be said to be parallel. But finally, after cutting the leather to size, meticulously marking and punching holes, and laboriously stitching the leather around the oar, I was satisfied with the result. After about two hour work (which I won't count against the boat building total) I completed one oar.
I then went outside to enjoy another sunny warm midwinter day. Today's task was to trim the strakes at each transom. With careful use of a Japanese (flush cut) saw, and a belt sander with 80-grit paper, the strake overhangs were brought flush with the transoms. Further sanding with 120-grit paper in an orbital palm sander finished the ends nicely. There are a couple of small gaps between the strakes and the transoms that will need to be filled in with thickened epoxy. But all is ready for the next step; the glassing of the interior. Total hours 41.00.
Thursday, January 26, 2006
Post glass trimming
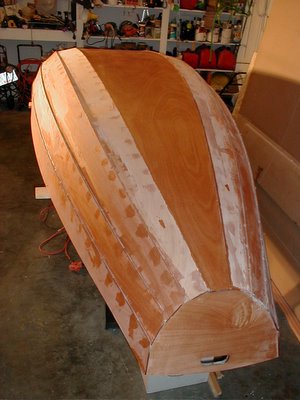
With the fiberglass partially cured, the excess glass cloth was trimmed away. I was fairly happy with the result. There are a couple of tiny bubbles along the edge at the lapstrake joint where air seeped back under the glass, despite my best attempts to work it all out. But these are very small, and in a place where additional layers of epoxy and then paint will cover them well. But overall, I was happy with my first attempt at glassing. In the future, additional coats of epoxy will be applied to the hull to "fill the weave" of the glass cloth. After the trimming, I am left with some long strips of glass cloth, and it seems a shame to discard them. I suppose some can be saved for patches and repairs that might be needed in the future. The idea also occurred to me to glass the leading and bottom edge of the daggerboard, to protect it from possible grounding damage. But the problem with that may be making the part too thick to fit in the daggerboard trunk. Also, it might be hard to fair the glass into the shape of the daggerboard for a smooth hydrodynamic shape. I think I just came up with another question for the experts on the CLC builders forum!
The next step is to trim and finish the transoms, before flipping the boat over for some interior glassing. But that will have to wait for this weekend. Tonight is spent on household chores, and tomorrow, Kathy and I attend an Alabama Symphony concert in honor of Mozart's 250th birthday. Happy birthday, Wolfie!
Wednesday, January 25, 2006
Bottom glassing
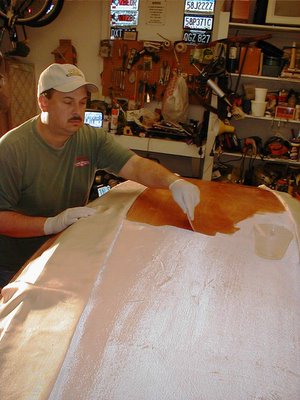 At long last, tonight it was time for the bottom glassing. As this was my first time working with fiberglass, I approached the job with a little apprehension. But things went smoothly. Unthickened expoxy was mixed, and liberally dumped on the sheet of glass cloth that had been smoothed over the bottom panel. This panel, by the way, is probably one of the easier surfaces for a first time glasser to do: it has a gentle, horizontal concave curve where gravity helps to keep everything in place. The epoxy gradually wets out the cloth, soaking it and adhereing it to the wood panel, while at the same time becoming amazingly clear. A rubber spatula helps to spread the epoxy, smooth out wrinkles and air bubbles, and remove excess epoxy. The result was an exterior bottom panel that will ultimately be glassed on the exterior and interior surfaces, giving structural strength and abrasion resistance to the hull. The instruction manual calls for a wait of a few hours for the epoxy to reach "gel" stage, at which time excess cloth can be trimmed off. However, colder weather has returned to the area, and even with a space heater under the hull, the curing will be a slow process. Trimming will probably have to wait until tomorrow morning. Total hours 40.75.

Tuesday, January 24, 2006
Glassing prep
 With my increasingly busy schedule, time management is important to allow reasonable boatbuilding progress. After a commute home that is slower and more frustrating every day (a disadvantage of living in the fastest growing county in the state), a return to a workout regimen, a quick dinner, and some household administration, perhaps an hour or so is left every evening to further the Passagemaker dinghy boatbuilding. Now that the next step of glassing the hull has arrived, I needed to finish some prep work tonight in order to complete the glassing in one evening. First was a return to the tedious job of sanding. Filled stitch holes, stray drips of epoxy, and previously unsanded bottom panel scarf joints needed to be tended to. Since only the bottom panel is glassed on the exterior, the adjacent #1 strakes needed to be sanded smooth so they could be masked with tape. This prep work took the better part of tonight's effort. And while doing it, I was reminded of an old TV commercial. Readers of a certain age might remember the sudafed commercial that featured Apollo astronaut Wally Schirra. While holding up a space suit helmet he asks, "Ever sneeze in one of these?" I seem to have acquired a mid-winter sniffle, and my nose continued to drip inside my respirator as I sanded.
After the sanding, I masked of the border of the bottom panel to prevent epoxy runover tomorrow. I then test fitted the fiberglass cloth, and it turned out to be a simple matter to lay it over the hull and smooth out the wrinkles. The cloth is a very loose weave, and is easily smoothed, with only a little care required to avoid snags and runs on the few remaining stitches that hold the bulkheads in place for now. Thus, all is in readiness for tomorrow. If I get an early enough start, I can apply the epoxy to the glass cloth (which will make it clear) and let it partially cure so that late in the evening, I can trim the cloth to its correct dimensions and remove the masking tape. That's the plan, anyway. Total hours 39.75.

Sunday, January 22, 2006
Plugged stitch holes
 With shop temps pegged at 70 degrees again today, I set about to plug the holes left from the removed stitches. For each of the nearly 300 stitches that had held the hull together, there were two holes, so that meant a lot of plugging. Fortunately, it was fairly quick work. With the Steelers game playing in the background, I mixed up a small amount of wood flour thickened epoxy and filled each hole with a metal putty knife. At this point, the boat is at a milestone of sorts. Except for a few remaining stitches temporarily holding in bulkheads, the hull for the first time is essentially watertight. It would actually float-- at least for a while. A pleasant thought... I guess that reflects progress. Total hours 38.25.
Saturday, January 21, 2006
Joint filling
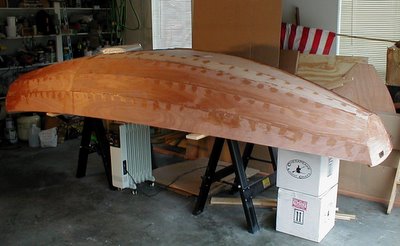
 With all the stitches removed from the hull (except those temporarily holding the bulkheads in place) it was time to return to the joints between the strakes. The LapStitch joints were fully filled with cabo-sil thickened epoxy, and areas where the stitches had been were filled in. Smoothing things off with a rubber spatula from an auto body shop was the method I used to make things as neat as possible. It was a humid 65 degrees in central Alabama today, and near 70 degrees in the shop, so the epoxy set up fairly fast. Near the end of an hour or so of smoothing, I found the epoxy getting hard to work with. But with the joints all reasonably well filled in and neat, I went over the hull with an alcohol soaked rag to wipe up drips and smears, as well as a couple of drips into the interior of the hull where epoxy had been forced through some of the stitch holes. Total hours 37.00.
Thursday, January 19, 2006
Stitch pulling
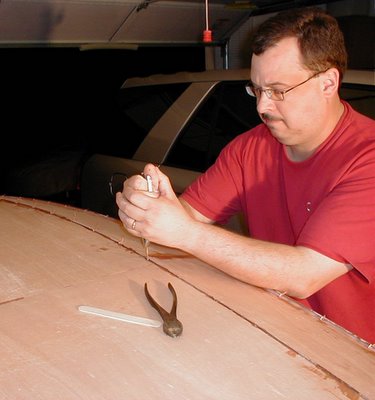 About 300 stitches got yanked out of the hull, undoing the work that took me nearly a week. The boat is now held together only by epoxy at the joints, and has already gained a good bit of rigidity. That will only increase as the glue joints are completely filled, and then the Fiberglas is applied. But for now, the copper wire stitches litter my shop floor, waiting to be swept up. The hundreds of little holes will also have to be filled; plenty of tasks lay ahead this weekend.
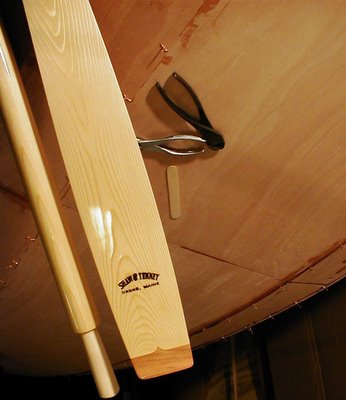
FedEx left me a package today: A beautiful pair of oars arrived from Shaw & Tenney of Orono, Maine. This is a pair of spoon blade oars, made of spruce with a blade-tip inlay of cherry hardwood. I also ordered the oar leather kit, which protects the wood where it will contact the bronze oarlocks. Lacing on the leathers is another task to add to the boatbuilding tasks. I am really impressed with the workmanship and finish of the oars; they give me a goal to strive for in finishing the boat. If I fall a little short, at least it will be understandable. After all, this is my first boatbuilding project. Shaw & Tenney have been in business since 1858! Total hours 35.50.
Monday, January 16, 2006
Seam sealing part II
Sunday, January 15, 2006
Sealing seams

After spending about an hour tightening the stitches in the hull, it was time to seal the joints between the strakes with epoxy. Whether it was some shifting of parts after flipping the hull, or stretching of the copper wire from stress, I found that many of the stitches were loose. My biggest concern was that loose joints would allow epoxy to drip through to the interior, making a big mess that would take lots of sanding to fix. So after about an hour going over each of the hundreds of stitches in the hull and tightening many, it was ready for the glue. (It is a stitch-'n-glue boat, after all.) I mixed up a batch of Cabo-sil-thickened epoxy and transferred it to my zip-lock bag injector. This session would just tack the strakes together between the stitches. Later the stitches are removed and the seams are then fully filled. I found it easiest to get the epoxy properly deep into the joint in the second and third joints. Here the chines are hardest, and there is plenty of room to work. The joint between the #1 strake and the bottom panel was the hardest to fill, since it is a very narrow angle as well as being the highest- just barely in reach as the boat sits on the sawhorses. In order to keep the temperature within curing range, I placed my space heater under the hull so it would trap a bubble of warm air which will hopefully radiate through the wood to the epoxy. The temp in the shop was about 53 degrees, while the air in the hull was 72 degrees. I was able to get nearly all of the seams done before it was time for the Bears game. So, more tomorrow. Go Bears!! Total hours 34.50.
Saturday, January 14, 2006
Hull Flip
 With Kathy's help, the hull shell was flipped over. I removed the plywood sheet on the sawhorses that was serving as my work bench. Now the boat is supported by boards on the sawhorses, allowing access to the interior as I work on the exterior. The rest of the afternoon was spent reorganizing and cleaning up the shop. Tomorrow, the epoxy-ing of the strakes!
Sail Kit
 While I struggle with an intermittent internet connection today (it's rather windy, and Charter Cable being the worthless entity it is, can't seem to maintain a connection in a breeze) I unpacked the Passagemaker dinghy sail kit that arrived this week. A wonderful Christmas gift from my dear mother, the kit contains all the hardware to turn the Passagemaker dinghy into a sailboat. Somewhere in transit, the plastic bag holding the tiny metal parts got ripped, so some of the hardware was loose in the packing box. I gathered it all up, and I think nothing was lost, but I'll check it against the packing list soon. The actual sails have been back ordered for 1-2 weeks. No matter, I am still a couple of months away from sailing. But I will be eager to actually see them when they arrive.
Now, on to the turning of the hull, in preparation of sealing the strakes.
Thursday, January 12, 2006
Stern bulkhead
 The stern bulkhead was stitched into place tonight, with considerably less difficulty than the middle one last night. This completes the stitching for a while. With a three day holiday weekend ahead, I will be flipping the hull over. Thickened epoxy will be applied to the joints between all the strakes to seal up the hull. Then the wire stitches can be removed, and the tiny holes can be sealed up. After all, no boat floats for very long with hundreds of little holes in it. Following the removal of the stitches, the bottom is glassed. That will be a whole new experience. Total hours 32.50.
Wednesday, January 11, 2006
Middle Bulkhead
 Tonight I wired in the middle bulkhead. This was more of a job than the bow bulkhead yesterday. The port side strakes didn't want to form up tightly to the shape of the bulkhead, and several extra stitches and some muscle was needed for a good fit on that side. But several broken stitches later, things seem pretty close to being in place. Some further tuning might be needed before I start sealing the joints between the strakes this weekend. Total hours 31.75.
Foam
You're not quite to that stage yet, but the only spots to obsess over epoxy coverage is on the inside of the air compartments. Moisture--and it can just be water vapor--in those compartments has an insidious way of staining wood. Passagemaker #2, which is in our showroom, has been used very hard this year and shows some small interior stains, probably because there were tiny pinholes in the epoxy coating.CLC also sells nifty deck plates, which provide a watertight bu
 t removable entry into a sealed air chamber. They aren't part of the Passagemaker kit, but I am probably going to get a couple for my boat. They would provide access to the chambers for storage of small items while sailing, and also provide a means of ventilation for a less than perfectly constructed boat that a first-timer like myself is likely to end up with. On my boat (as opposed to the take-apart version) the deck plates would be installed in the fore and aft bulkhead at the centerline of the boat.
Tuesday, January 10, 2006
Bow Bulkhead

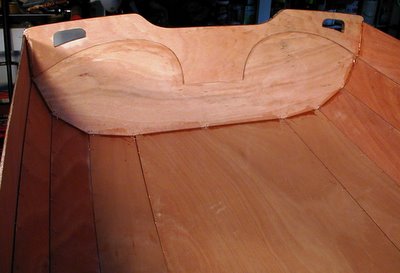
The next step in boat construction is to add some internal structure. The three bulkheads will give the hull more of the proper shape, and ultimately provide hull strength, supports for seating, and in the case of the bow and stern bulkheads, sealed air chambers for buoyancy. However, at this point, the bulkheads are wired in place, but not epoxied. For now, they only provide shape and rigidity while the hull is flipped over for glassing the exterior. Measuring the position of the bulkheads and getting them relatively plumb was more of a job than I expected for a solo builder. An extra pairs of hands would have helped. But I was able to position the bow bulkhead and stitch it into place. The mid and stern are only roughly placed for the photo; they will be stitched later this week. The overall layout of the boat comes a little closer into view with this internal structure in place. Total hours 30.75.
Monday, January 09, 2006
Stitch removal
 As a child, I had more than my share of injuries and stitches. In fact, so experienced was I in the whole process that as a poor graduate student, I removed stitches after a mountain bike mishap from my chin myself, rather than return to the doctor for another visit for which I had no insurance. That experience came into play as I pulled the stitches from the transoms after two days of curing the epoxy "tack welds." They came out readily, and I didn't have to resort to the instruction book's trick of heating stubborn wires with a butane lighter to help remove any stuck in epoxy. Then with the transoms free of wires, I applied a neat fillet along the entire periphery of the joint. In a couple of hours, the semi-set fillet can be further smoothed with a latex gloved finger to make a nice smooth surface. Total hours 29.75.
Saturday, January 07, 2006
Peanut butter
Recently at a dinner party, I spoke at length with someone in the peanut business. Peanuts being an indigenous crop of the South, and one of my favorite snacks, I took the opportunity to pepper the hapless businessman with question after question. I came away knowing all that there is to know about the growing, harvesting, and processing of peanuts. Well, more than I knew when I started, anyway. I was reminded of that night as I worked for the first time with "peanut butter" epoxy.
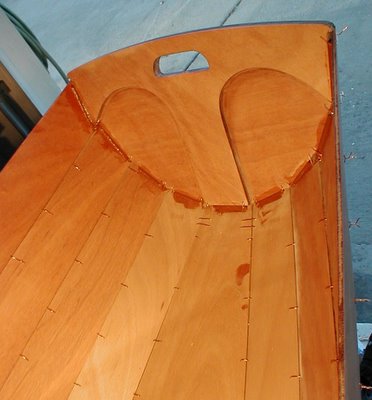
But first, the transoms were stitched in place. The instruction book mentions that a builder should expect to break a few wires getting the pieces into place. And despite a flawless start, I did indeed snap a few wire stitches before I was done. The most difficult part of the installation, it seems, comes at the end, when the last little bit is being aligned and pushed into place. This is where the parts sometimes need a little "persuasion" to make all the joints snug, and coincidentally this is when the tension on the wires is at the highest. But after some effort, all the joints looked snug and correctly aligned. So then it was time for the peanut butter.
For the joining of two parts at a right angle, the standard epoxy mix is thickened with "wood flour", or very fine sawdust. The final consistency needed is that of peanut butter, which allows the epoxy to be applied in beads which fill the joints and won't run before it cures. I followed the tip from the book, and put the thickened epoxy into a plastic bag with one corner snipped off. This allowed it to be handled like a pastry piping bag- something with which I am familiar. So a short bead was applied to the transoms between the wire stitches to "tack weld" the parts in place. After curing, the wires can be removed, and the joints are filled in with a neat bead, or fillet. Total hours 29.00.
Thursday, January 05, 2006
More wires
Monday, January 02, 2006
Running the clock
Sunday, January 01, 2006
Transoms
Yesterday was a much needed day of cleanup and organization. Quarter sheets of sandpaper- both unused and spent-along with dust and other detritus of the building project were everywhere. I took a good afternoon to get things in a little better order before continuing on.
Hope 2006 is a great year for everyone! Total hours 26.25.
