Monday, February 27, 2006

Mast Step Support

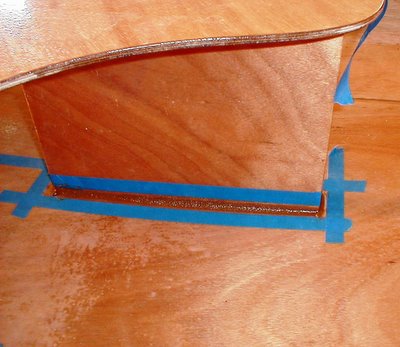
On the Passagemaker dinghy, the mast is stepped into a plate that is bolted to the bow seat. Underneath the mast is a structural member that supports the downward forces that the mast and stays create. So now that the forward bulkhead is installed, I epoxied the mast step support into position. The center of the bulkhead was marked off. Then the support was test fitted. The lower aft corner had to be knocked off with a rasp in order to clear the fillet on the bulkhead. Once the support was centered, square and plumb, the position was marked. It was then removed and wood flour thickened epoxy was spread on the mating surfaces. The support was then put back in place, and a fillet was smoothed on either side. No masking tape this time, as this part won't be visible in the finished boat. The support stayed in place well, with no need for tape or other temporary bracing to hold it while the epoxy cures. Total hours 58.00.

Sunday, February 26, 2006

Bulkhead fillets

The DB trunk/mid seat unit was removed once again. A small pilot hole was drilled through the bottom to mark the DB slot location from the bottom exterior. Then a batch of peanut butter thickened epoxy was mixed up (the whole job ended up needing two batches, a total of 8 pumps from each epoxy dispenser). Using the Zip-loc "pastry bag" dispenser, a bead of epoxy was applied to the bottom face of the DB trunk, where it would contact the hull. The unit was then returned to its position using the felt tip marker orientation marks, and clamped in place. Then, a bead of epoxy was applied the junction of hull and bulkhead for all three parts. The resulting bead was shaped to a clean fillet with a tongue depressor, and excess carefully removed with a rag, or a clean edge of the tongue depressor. After the epoxy partially sets in a few hours, I'll go back to smooth things over, and remove the masking tape. Total hours 57.50.

Bulkhead masking

On a chilly winter morning in central Alabama, a novice boatbuilder of Polish decent drank coffee from Sumatran beans as he worked on a boat of Norwegian, er, Swedish (make it Scandinavian) design made of mahogany grown in west Africa, milled in France to British quality standards, and cut in Maryland, all while watching a frantic gold medal Olympic hockey game played in Italy by teams from Finland and Sweden. Who says the world isn't interdependent?

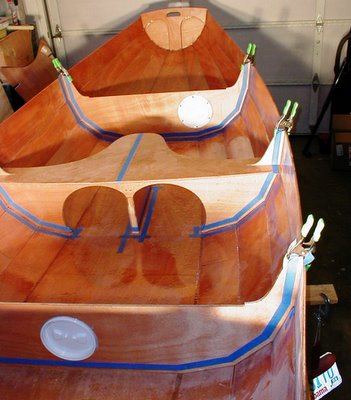
After some scuff sanding yesterday at the positions for the bulkheads, I placed the three bulkheads in place for their permanent installation. Particular care was given to the center seat/daggerboard trunk unit to get the trunk aligned with the center line of the Passagemaker dinghy. Using an L-square, I laid down a strip of tape on the top surface of the center seat parallel to the centerline of the daggerboard trunk. This allowed me to align the unit with a string line running down the center of the hull. Fore and aft position was placed with measurements from the bow as specified in the instructions. The forward and aft bulkheads were placed in position with the help of the seat surfaces. Fitting the bulkhead "ears" through the slots in the seat, then positioning the seat with its respective transom put the bulkhead in position. The forward bulkhead angle relative to the bottom panel was adjusted with the help of the mast step support, which will be epoxied in place later. Since its angle with the bottom panel isn't 90 degrees, the stern bulkhead was adjusted to be roughly parallel to the stern transom. All three parts were clamped in place, and fit fairly well without further manipulation.

Then, along the joints that will soon be filleted with peanut butter epoxy, masking tape was laid down to keep a neat edge. I also made a few position marks with a felt tip marker to record the positions of the parts, in case anything gets shifted. In fact, the center unit will come out again so I can drill a small pilot hole to mark the interior of the DB trunk through to the exterior bottom hull. Also, epoxy will be applied to the surfaces of the DB trunk bottom, where they contact the hull. This joint will be one of the most critical to make strong and waterproof.

So, with the prep work done, it is time for a break. And another cup of coffee. Oh, and Sweden won the game, 3-2. Total hours 56.00.

Friday, February 24, 2006

Design lineage

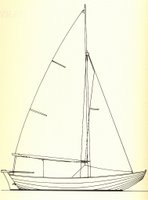
As mentioned at the start of this project, the Passagemaker dinghy design is inspired by a traditional Scandinavian sailing pram. Today I received a copy of the out-of-print Sailing Craft by Frank Rosenow. This literary study of Swedish working craft of the 30s and 40s depicts the lineage of the Passagemaker dinghy. A ubiquitous Swedish working boat, called an eka, is perhaps the father of the Passagemaker. The version that Rosenow describes is slightly bigger, at about 14 feet LOA. But the design influences are unmistakable, with the characteristic snub bow, and lapstrake hull. Some minor differences include the eka's raked stern transom, and a Marconi rig that contrasts with the sliding gunter rig of the Passagemaker. When my own copy of Passagemaker finally takes to water, I will have Rosenow's book to remind me of the rich history of its simple, elegant design.

Thursday, February 23, 2006

Second interior coat

The interior of the hull got its second and final overall coat of epoxy. The lesson of tonight is that lighting is important. After the first coat, things looked good. Then while I was glassing and assembling the daggerboard trunk, I used the excess epoxy to give some crevices and joints a little extra coverage. With a foam brush, I really worked the joints, forcing epoxy into any gaps or voids I could find. I was satisfied with the effort, until the next morning when I opened the shop (garage) door. In the sunlight were some drips and runs that I hadn't seen, even under the glare of my 1000-watt worklights. The lighting just wasn't at the right angle. I was crestfallen the rest of the day, thinking about the flaws in what I had thought was a superb job. So tonight, a few deft touches with a belt sanded and 120-grit paper made quick work of the drips. Then I was off and running on the second coat. This one finally filled the weave of the bottom glass, and sealed the lapstrake joints once and for all.

I'll take a well earned day off tomorrow to celebrate the week's end with my wife at our favorite pizza joint. Then this weekend comes the permanent installation of the bulkheads and daggerboard trunk/seat unit. Total Hours 54.50.

Wednesday, February 22, 2006

Inspection port install

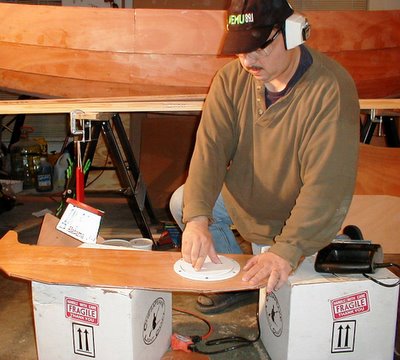
After the assembly of the center seat unit, I turned to the other two bulkheads that will soon be installed in the hull. Reasoning that it would be easier to install the deck plates in a flat piece of plywood, I broke out my hand jig saw. A circle was marked on each bulkhead by tracing around the edge of the deck plate cover. According to the instructions, cutting 1/8" outside this circle would provide the proper sized hole. It was much easier that I anticipated to make an accurate cut. The inspection port in the stern bulkhead was located in the center, while the forward one was moved to the right side to avoid later interference with the mast step support. On the first bulkhead, I drilled little pilot holes for the six screws that hold the port flange in place. This turned out to be unnecessary, as I discovered with the second plate that they were indeed self-tapping, as advertised. Some silicon caulk was applied around the flange before it was screwed down. The result was a nice, clean, watertight yet removable opening in the two flotation air chambers that will allow ventilation.

Since the job went quicker than I planned, I had time to lay the internal structure in the hull, just to test fit, and see how things will look. It is easy to imagine being out on the water under sail! Hopefully in a couple months. Total hours 53.50.

Tuesday, February 21, 2006

DB trunk fillet


With about 6 ounces of wood flour-thickened epoxy, I laid a neat fillet on the joints of the daggerboard trunk/middle seat assembly. This was after unscrewing the DB trunk from the bulkhead where it had been test fitted yesterday. I drilled a small pilot hole through the seat where the channel of the trunk had been marked. This will serve as a marker later on when I open up the slot from the other side for the daggerboard. Peanut butter epoxy was then spread on the interface between the bulkhead and the trunk spacer, and on the top edges of the trunk, where they contact the underside of the seat. The trunk was then returned to its position, screwed back in place, and re-aligned. The epoxy fillet was then applied with the plastic "pastry bag" applicator method. A large radius tongue depressor was used to smooth and shape the fillets, and an alcohol-soaked rag was used to wipe up the few drips. Later on when the epoxy has partially cured, the fillets can be smoothed further. Total hours 53.00.

Monday, February 20, 2006

DB trunk mockup

Continuing on with the construction of the center seat/daggerboard trunk assembly: After 24 hours of curing, the spacers were trimmed, and the mating edges of the daggerboard trunk were sanded flush. Then came the initial fitting and masking for the filleting of the whole unit.

Essentially, the daggerboard trunk is a hole in the bottom of the boat. Since the hole is sealed to a collar the rises from the hole higher than water level, buoyancy is not threatened. But this is perhaps one of the more critical steps in building a Passagemaker dinghy. The daggerboard trunk contains many joints, all of which must be absolutely waterproof. Also, since this is the slot that the daggerboard passes through, it must be plumb, square, and aligned with the centerline of the boat. So tonight was a trial run in assembling the trunk proper, the midships seat, and the center bulkhead all into one unit. Being careful to keep checking for squareness and plumb, I marked the final position of all the parts. Then, 1-1/4" bronze screws were countersunk through the bulkhead into the aft spacer of the trunk. When everything was finally aligned, the borders of the future epoxy fillets were masked with tape, to give clean edges. All is ready for the permanent epoxying of this unit. Total hours 52.25.


Sunday, February 19, 2006

Survey says...

Some insights from the Passagemaker dingy survey:
  • 60% of respondents own a kit. Of those who don't yet own one, 50% plan to purchase one in the next year.
  • Among the present builders, 33% estimate they are within 60 days of completing their Passagemaker. A similar number are more than three months away from completion.
  • Estimates of building time vary: 16% believe they can complete their Passagemaker in 80 hours. 50% percent will take longer than 110 hours.
  • All respondents report that this is their first boatbuilding project. A majority, 63%, are self-taught. 25% claim some previous woodworking experience.
  • The largest collection of Passagemaker builders are on the East Coast- 44%. The Southeast is home to 22%, and the Midwest and west coast each have 11%. There is even a Passagemaker enthusiast in Alaska!
  • 89% of owners intend to use their Passagemaker as a day sailer. 33% plan to fit an outboard motor, and 22% plan to use it as a tender to a larger vessel.
  • A majority of Passagemaker dinghy sailors (56%)will use their craft on inland water.

There was universal interest in the Passagemaker Dinghy Forum. If you haven't joined yet, why not register today?

Daggerboard trunk


Tonight I only had time to assemble the daggerboard trunk. A quick sanding on the edges smoothed the mating surfaces for the spacers. Then I mixed up some unthickened epoxy and gave the interior surfaces another coat to fill the weave of the fiberglass. The remaining epoxy I thickened with Cabosil, and spread it on the mating surfaces of both panels. The spacers were put in place, and sandwiched between the panels. It was surprisingly difficult to align everything when the clamps were put on. All the pieces slipped and slided, until the majority of epoxy was finally squeezed out. I then gave the parts one more alignment, shifting clamps as I went. After I brushed off most of the excess epoxy, I brought the part in the house to cure in the warmer air. Total time 51.25.

Saturday, February 18, 2006

Interior sealing

As a miserable, cold rain fell outside, and Team USA struggled against Slovakia in Men's Olympic Hockey, I put the first of two overall coats of epoxy on the interior hull. Even though the strakes had been previously coated or fiberglassed, this overall coat of unthickened epoxy served to seal the inter-strake joints, as well as to fill the weave of the fiberglass on the bottom panels. But first, I spent some time to give a final sanding to the stitch holes that I had previously plugged. This involved sanding the plugged holes, and also the edge of the fiberglass, which although carefully trimmed, was a little ragged in spots. After the prep sanding, I then had to spend time vacuuming and wiping down the surfaces which had become extremely dusty. (Which reminds me, can anyone recommend a good shop vac?) After the cleanup, I applied a coat of epoxy to the entire hull interior, giving special attention to the strake joints. I found that placing the foam roller lengthwise along the joint and pressing would squeeze some epoxy into the joint. Then rolling gently over it would give a smooth finish.

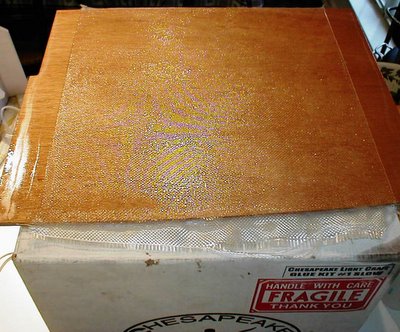
I also glassed the interior surfaces of the daggerboard trunk. This was the first modification to the build instructions that I have made; it was suggested to me that this would be a good use of fiberglass cloth scraps that I have accumulated. So I applied the cloth and saturated with epoxy, then I quickly trimmed the edges using a straight edge, and removed the glass cloth where the trunk spacers will be. With a putty knife, I scraped the epoxy from the spacer surfaces, so as to have a clean mating surface. When the epoxy gels, I'll trim the cloth overhang. Total hours 50.75.

Thursday, February 16, 2006

Passagemaker Dinghy forum

Results have started to come in for the survey mentioned below. I'll continue to let that run for a while to accumulate more data. But one thing is clear- there is interest in a Passagemaker forum. So without further ado, the Passagemaker Dinghy owners/builders forum is now open. Be the first on your block to register! Things may go slowly at first, but continue to check in. As the community of Passagemaker sailors grows, I'm confident that the board will become a great place to meet with other Passagemaker makers!

Wednesday, February 15, 2006

Band of Brothers?

I received a kind e-mail yesterday from a fellow Passagemaker builder. This has happened occasionally, and with increasing frequency. Whether nearly finished, just starting, or merely considering a Passagemaker building project, I enjoy hearing from all Passagemaker builder/owners out there, and trading information with them. I have begun to toy with the idea of setting up an internet forum devoted to Passagemaker dinghy owners. My model would be something like this forum devoted to owners of the Skerry, another of Chesapeake Light Craft's products. Being a curious scientific type, I'd like to know a little more about the Passagemaker owners out there. So I've designed a quick, 10-question survey to gain some insight on what I assume is a growing band of Passagemaker brothers. And sisters. Please take a brief moment to answer the survey. If there is enough interest, perhaps I can set up the forum in the near future. . Click here to take survey Once a useful number of responses are collected, I'll report back with some data.

Monday, February 13, 2006

Interior hole plug


Ahead of epoxy coating the now-glassed interior, stitch holes had to be plugged. I mixed up a small batch of epoxy, and thickened it with wood flour to a peanut butter consistency. The instruction book calls for applying a small dot of epoxy to each stitch hole, using the plastic "piping bag" method. Instead, I opted for a medium size plastic syringe, of which I have collected several from fried turkey marinade containers. The loaded 30 mL syringe made a great dispenser, and I was able to quickly lay a tiny drop on each stitch hole. A quick swipe with a metal putty knife smoothed everything off, ready for the overall coat of epoxy to come. Total hours 47.75.

Sunday, February 12, 2006

Leather man

This morning, I summoned the enthusiasm to stitch the leather onto my second oar. The first oar was a tedious job, but with experience, the second one went much easier. One secret I found was to poke holes of sufficient size in the leather. I used a little brass brad the first time, and the hole it left was too small to pass the sail needle through. This time I used a slightly bigger nail to poke holes, and the job went much easier. I also learned from the first oar about measuring and cutting the bevel for the button (the leather collar at the end of the leather which retains the oarlock). Measuring length and cutting the bevel on a flat button leather will result in a piece that is too short once wrapped around the oar. My second attempt was much better. In the photo above, the button is being held in place temporarily while the contact cement cures. The Passagemaker dinghy isn't the only thing that employs "stitch and glue" technique! One final note- a pet cat in the vicinity slows down the stitching process. Dangling Dacron threads and needles proved an irresistible plaything to our cat, Reuben, while I was trying to work.

Wednesday, February 08, 2006

A uniter, not a divider

The agenda for this evening was to assemble various parts in preparation for future use. So, with a batch of Cabosil-thickened epoxy mixed up, I set to the task of gluing and clamping. First was the mast coupler. The mast is made of two sections of aluminum pipe stock, joined by a coupler segment that fits tightly inside. Since this joint is not in the center of the mast, it raised the question (in the absence of any guidance from the instruction book) of whether the short segment should be at the top or the bottom of the mast. With all the engineering knowledge (1 semester of Intro to Civil Engineering, US Coast Guard Academy, 1984) and reasoning ability at my disposal, I arrived at the conclusion: it probably doesn't matter. But with the theory that placing the joint low would lower the lever arm of the infinitesimal weight of the coupler, I epoxied the coupler halfway into the longer mast segment. Then, as I epoxied the masthead plug into the other end of that same piece of pipe, I sealed my fate, as it were.

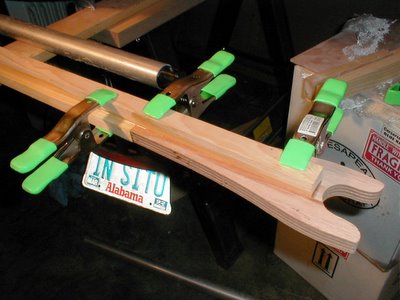
I went on to glue together the mainsail boom. This yard ends up having a T-shaped cross section as the two pieces of Cypress lumber are joined. A third piece of milled plywood is attached to the end to form a fork, which will ride against the mast- a simplistic boom gooseneck.

Next came the daggerboard handles, which are layers of cut plywood on either side of the large plywood daggerboard. These will later be shaped with a router for a nice smooth finish.

Finally, as my Cabosil-epoxy and clamps ran low, I joined the two thicknesses of plywood that make up the skeg. This fin-like structure will later be attached to the underside of the hull, giving some directional stability, protection during beaching, and a hand-hold when handling the boat out of water. Total hours 47.00.

Sunday, February 05, 2006

Interior fillets and glass

Just ahead of a possible rare snowfall in the Birmingham area, I finished the job of glassing the interior of the boat. The first step was to apply a fillet of wood flour-thickened epoxy to the joint between the bottom panel and the first strake. This filled the gap that existed in some spots, and also created a smooth radius to accommodate the glass cloth. This had to be done carefully and neatly, since it will be visible underneath the cloth and the bright (varnished) finish that will be used in the interior. With the fillet freshly applied, the cloth was laid over the bottom and first side panel and wrinkles were smoothed. At the beam, the cloth is just wide enough to cover. At this point, the unthickened epoxy was mixed, poured, and carefully spread and worked into the cloth. Wrinkles and bubbles were worked out, and the result was satisfactory. I found that I had to keep a watchful eye especially on the joints and stitch holes, as new air bubbles kept appearing underneath the cloth. These are easily removed, but more kept appearing for an hour or so before everything became saturated. In a couple of hours, the epoxy will reach gel stage, and the excess cloth can be trimmed off, as before on the exterior. The third photo below below shows a closer view of the fillet and glassed bottom. For a novice, a decent job. Total hours 46.25.

Saturday, February 04, 2006

Interior glass prep

Once back from a morning in the lab, I turned to the task of preparing for glassing the interior. As for the exterior, this involved some sanding. Actually, considerable sanding, in order to clean up some drips of epoxy that had worked through the stitch holes from the exterior. Also, I hadn't yet sanded the scarf joint on the center panel, so that got smoothed out. Once the bottom panel and first strake were clean and ready for glassing, I vacuumed out the interior (I have got to get a shop vac). Then the joint between the first and second strake was masked with packing tape to protect from epoxy overruns.
I also prepared some other parts for tomorrow. With any leftover epoxy from the glassing operation, I can glass the interior of the daggerboard trunk. Since I had already coated these parts with epoxy, I sanded in down and left a rough finished surface. I trimmed some glass cloth scraps to size. I plan to lay the cloth on the parts, then when the epoxy has reached gel stage, I'll use the daggerboard spacers as a template to trim the edges. Thus, the glass will only be on the interior trunk face, while the overall dimensions of the assembled trunk won't be increased by the thickness of the glass. I also have on hand some other parts, ready to be assembled with excess epoxy. Mainsail boom, mast joint and masthead cap, daggerboard handle, and skeg are ready to go.
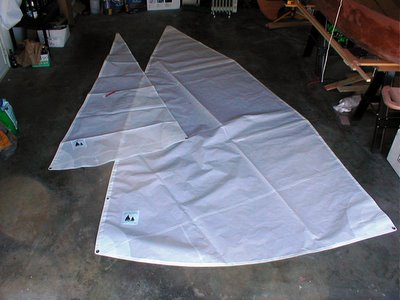
Finally, I checked out the sails: 77 square feet of Dacron (?) cloth, complete with grommets, telltales, and battens. They look great- I can't wait to try them out! Total hours 44.00.

Updates soon

Stay tuned- boat updates will continue later today. After finishing up a science manuscript, and a couple of hours of work yet to be done in the lab this morning, I will finally be able to return in earnest to boatbuilding. Later today I will post pictures of the sails, which arrived yesterday. Seems I jumped the gun a bit, saying they were made in Maine. It turns out this set was made by Douglas Fowler Sailmaker of Ithaca, NY. Though it's a bit disappointing not having that psychic tie to Maine, they look to be fine sails.

Viral titer assays await! More later today.

Thursday, February 02, 2006

Delays

No boat work last night, and I am really getting anxious to get back to it. But employment calls. I've been occupied most evenings this week preparing a manuscript for publication. Look for it on newsstands near you! DNA repair favoring minus-strand accounts for maintenance of alternative primer binding sites following limited replication of HIV-1, by Peter G. Eipers and Casey D. Morrow. Should be a best seller...